Instructions and information for using the 3D software
** BEFORE YOU BEGIN – Have the dimensions of your room, the location of appliances and windows on hand. The software works with the GOOGLE CHROME WEB PAGE, EDGE only **
GETTING STARTED – OPENING THE SOFTWARE
StEp 1
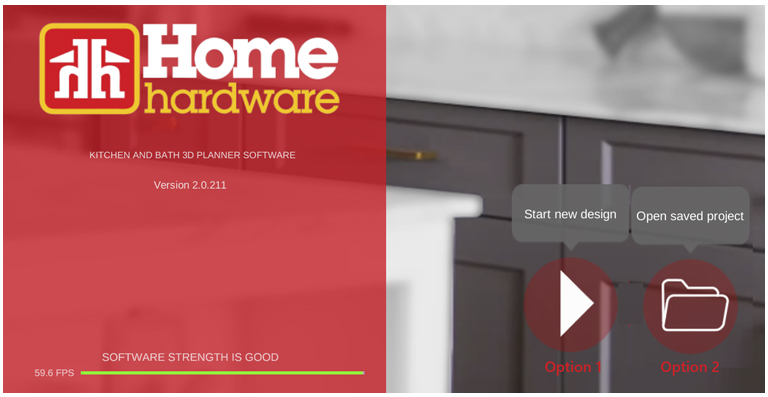
Start our project
Option 1
Click on the triangle if you want to start a new project – then continue with the following steps.
Option 2
Click on the folder if you had saved a project and want to rework it.
CONTINUED – click on the computer and then select the file you previously saved, and the software will reopen the file.

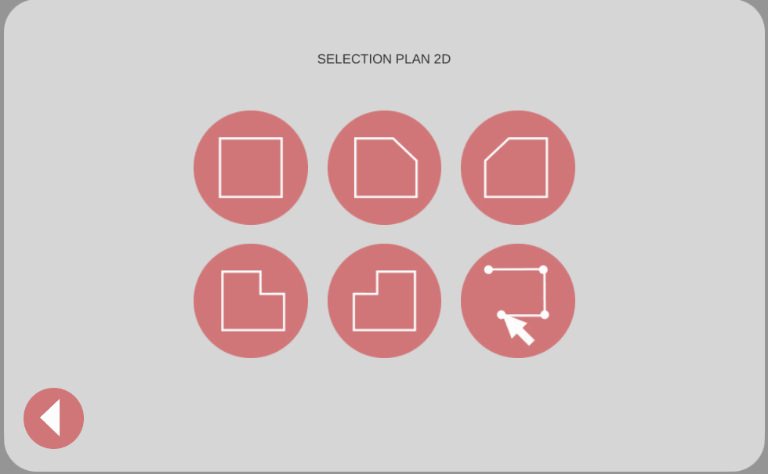
StEp 2
Select the shape of the room
Select the shape of the room that corresponds to your kitchen by clicking on the image.
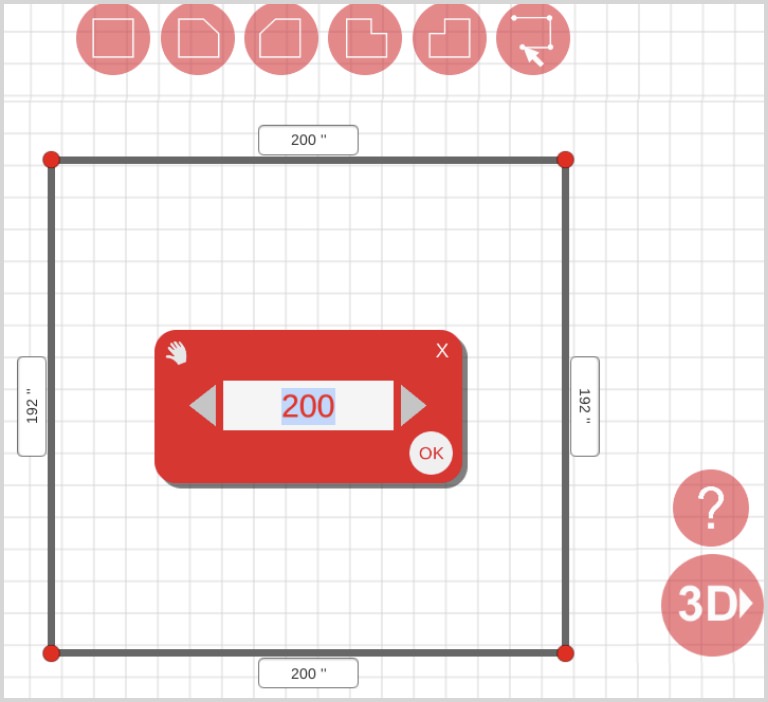
StEp 3
Enter the measurements of our room
Option 1
Click on the numbers.
Option 2
Drag the line.
Once our measurements are entered to customise our room – we click on 3D.
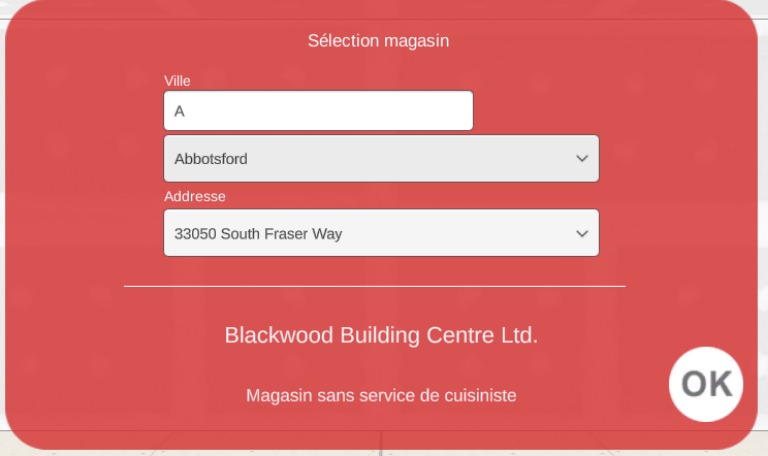
StEp 4
Store Selection
A
Enter the name of the city by selecting the name – you need to use a Capslock for the first letter.
B
If there are several Home Hardwares in the same city, the address of the Home Hardware is selected.
Click OK.
CREATION OF THE BASIC KITCHEN
We arrive in the completely blank room – the basic version – we keep the floor and wall blank, we install only the cabinets, appliances.
StEp 1
Start with the cabinets from bottom to corner.
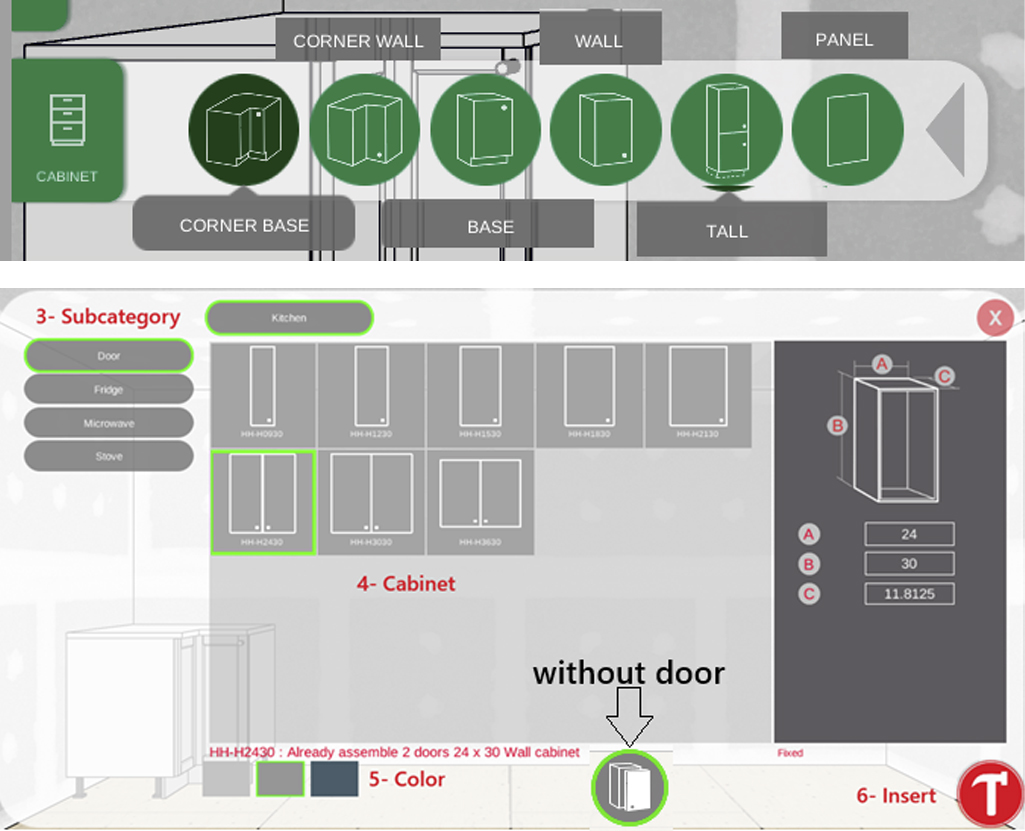
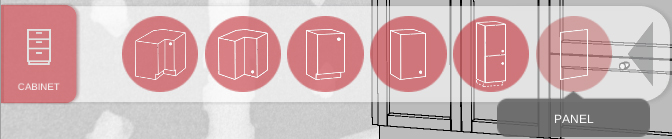
Click on the CABINET icon
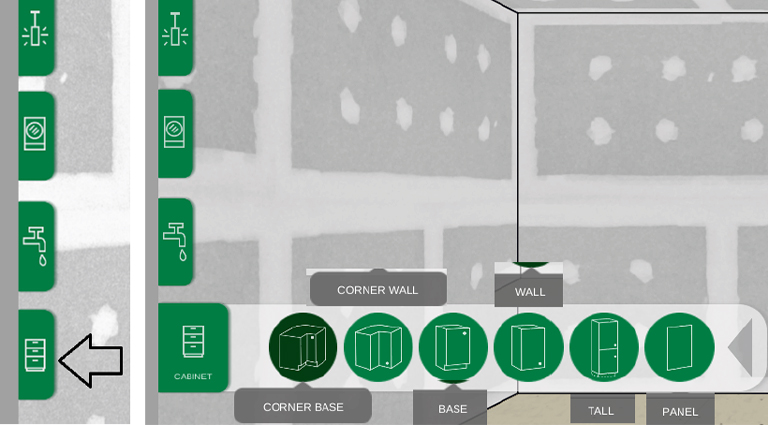
StEp 2
Insert the cabinets into the room
We see the furniture available in the category of cabinet from bottom to corner.or
A
We select the cabinet we want.
B
Select the color of the door you want, or the option without a door.
C
Click on the HAMMER to insert.
D
Click on the WALL at the location where you want the cabinet to be.
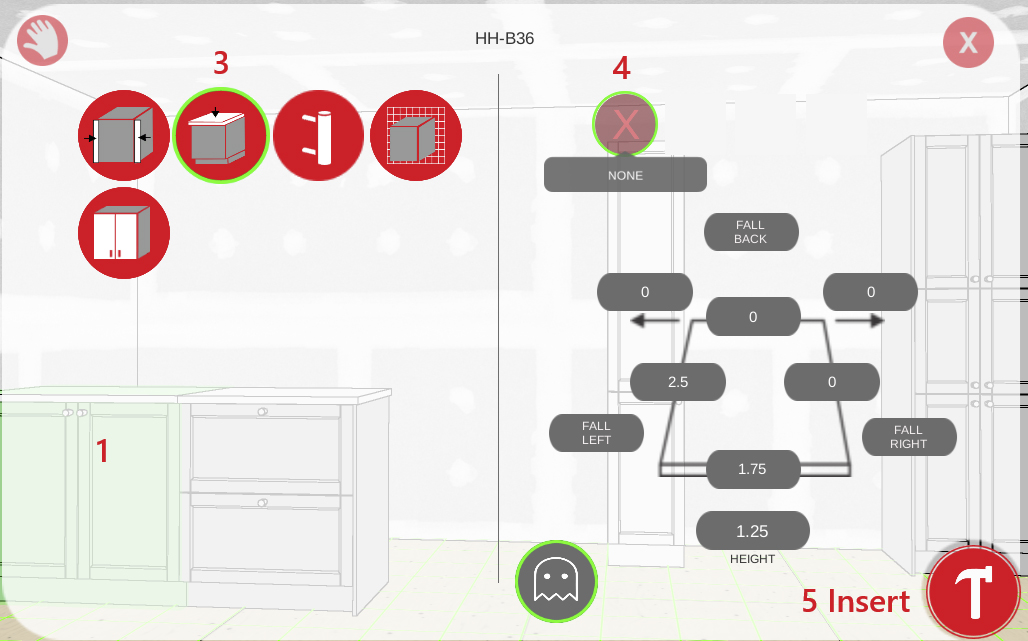
StEp 3
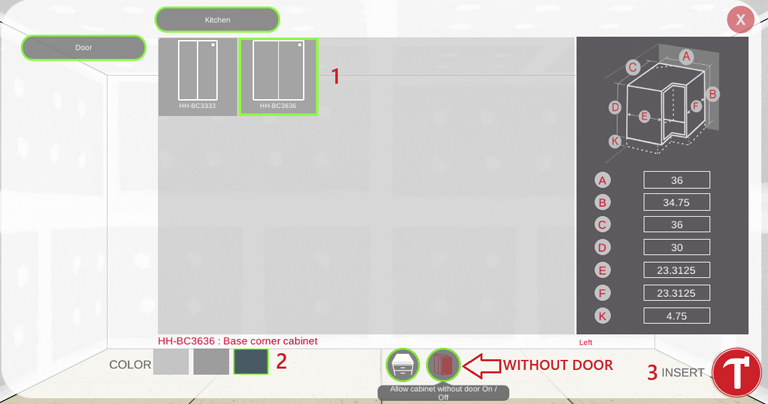
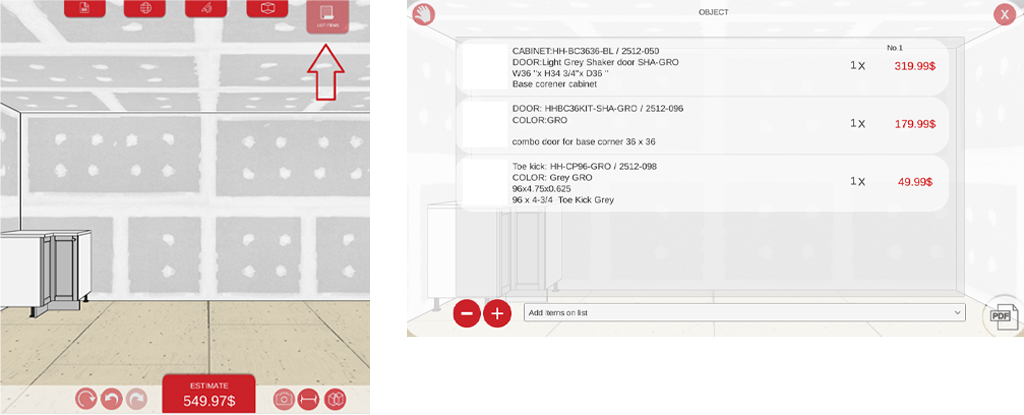
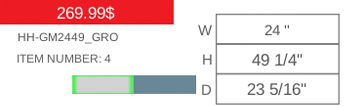
The cabinet is in the room, you see the cabinet in place, if you click on the list, you see the code, the price and the quantity.
As you can see, the kick is automatically calculated and added to the list. Also, since the doors are sold separately, the door code is added based on the selected color.
StEp 4
Add the cabinets you want
The subcategory
A
Bottom cabinet – door, drawer, microwave.
We have the choice to put a counter or not. To put up a pantry, you have to remove the countertop.
Wall Cabinet – Door, Fridge, Microwave, Oven.
B
We select the cabinet we want according to the desired size. (Measuments cannot be changed).
C
Select the color of the door you want, or the option without a door.
D
Click on the HAMMER to insert.
E
Click on the WALL where you want the cabinet to appear.
Armoire – Catégorie
StEp 5
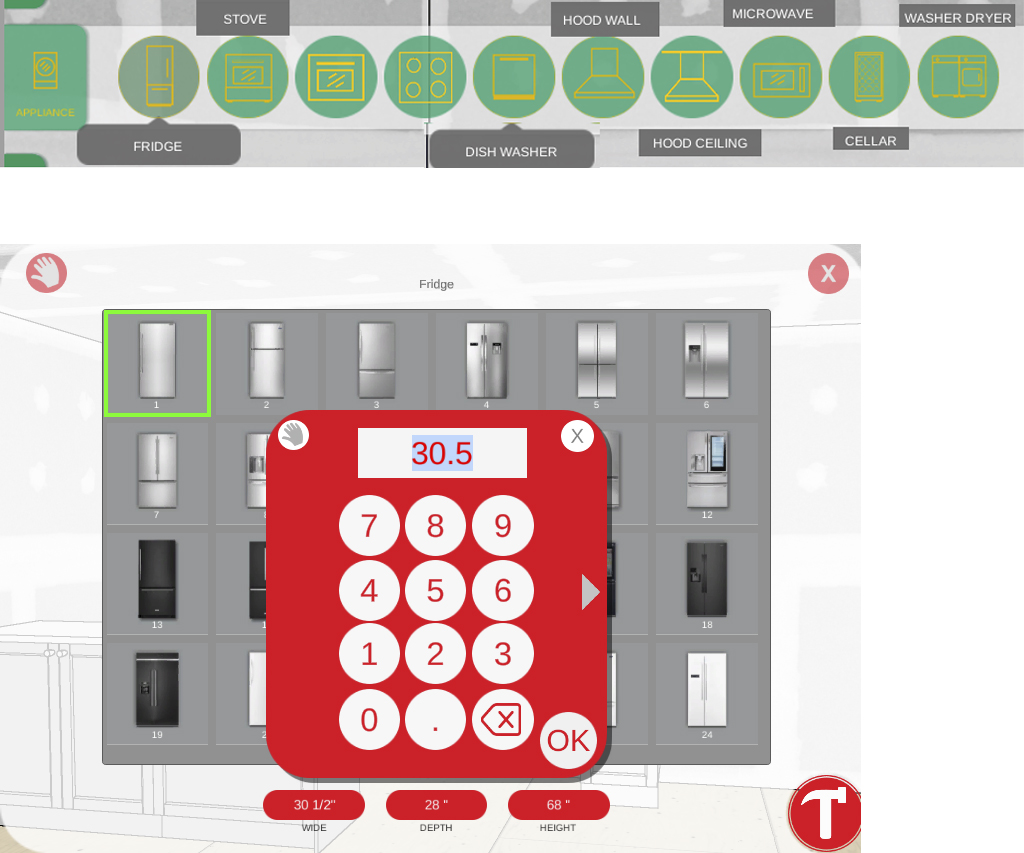
Addition of appliances
Dimensions are adjustable.
électroménagers – Catégorie
StEp 6
Finished Kitchen
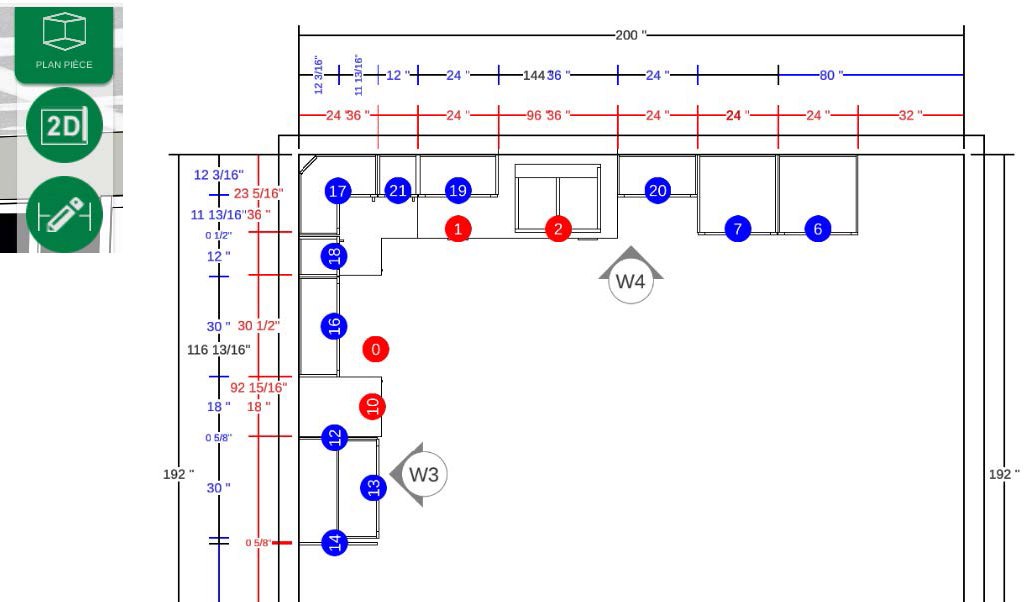
To prepare the order – you have to extract the PDF – or save it on your computer if you want to rework your plan or send it to someone.
For example, a customer could email you their saved file so that you can confirm everything.
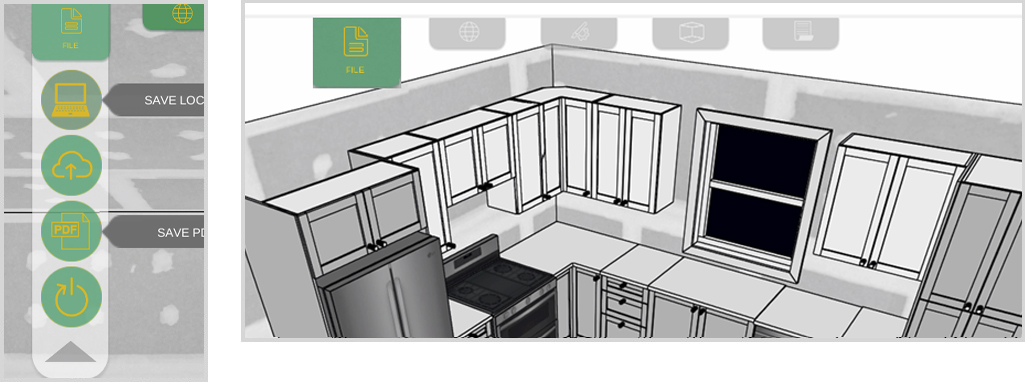
It saves the 3D plan – 2D plan with dimensions – list of items identified/numbered – price.
Island installation
StEp 1
Central island
We select the bottom cabinets we want as an island, to put them side by side, I strongly suggest using the magnet to glue the cabinets together.
StEp 2
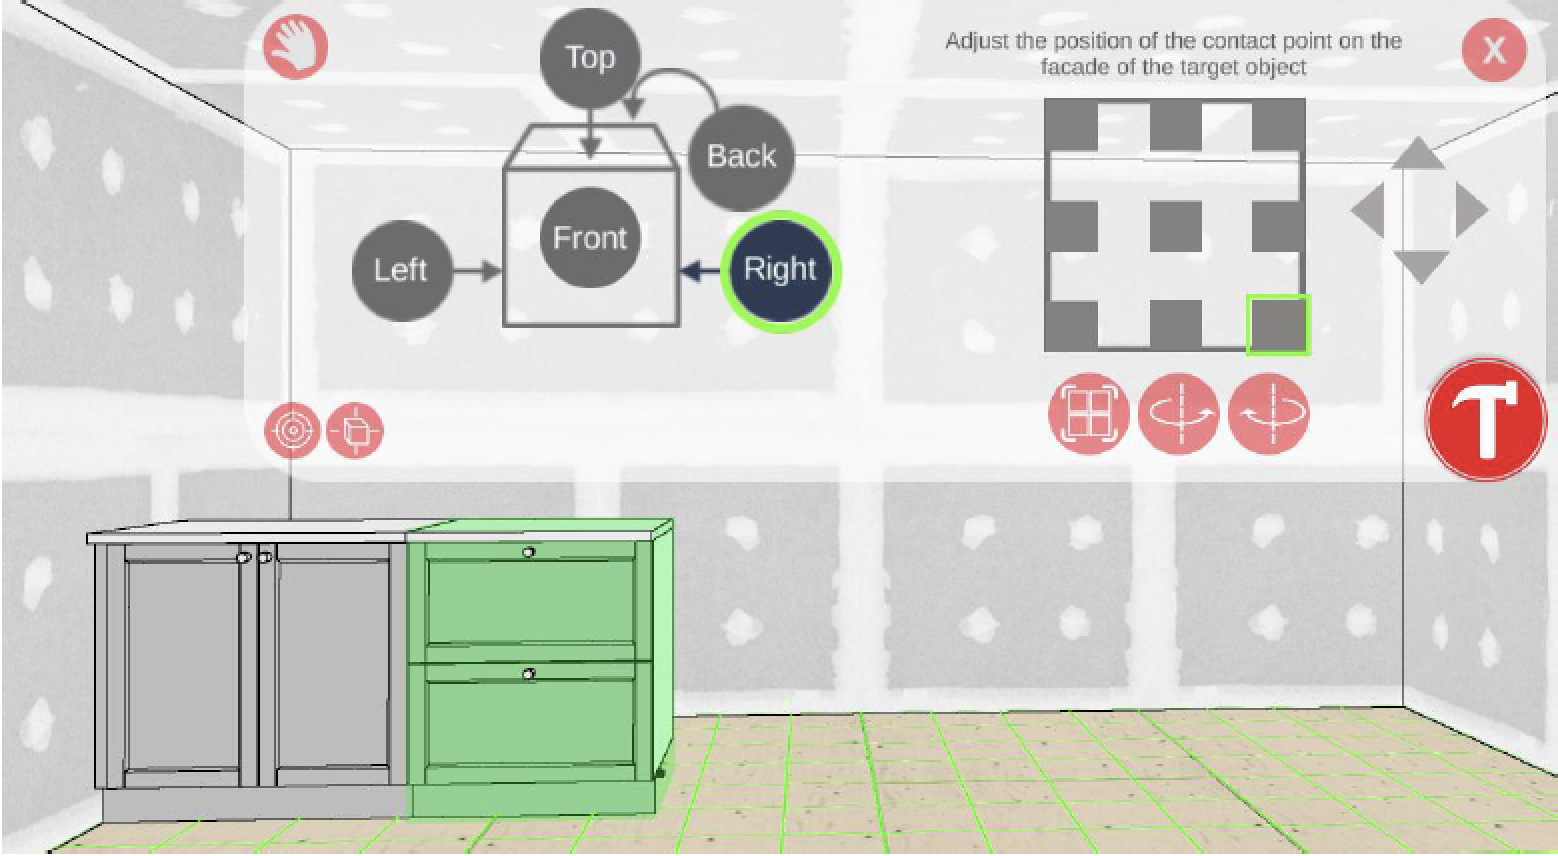
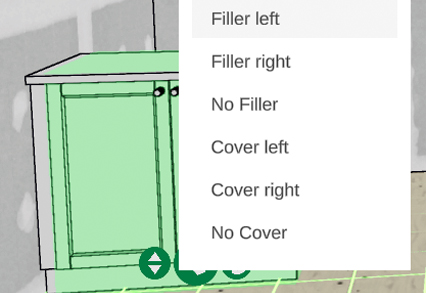
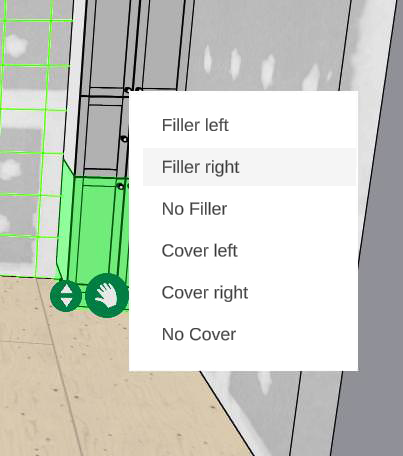
To put panels on the side – Right click on the cabinet, click on Right panel – the panel is added next to the cabinet.
StEp 3
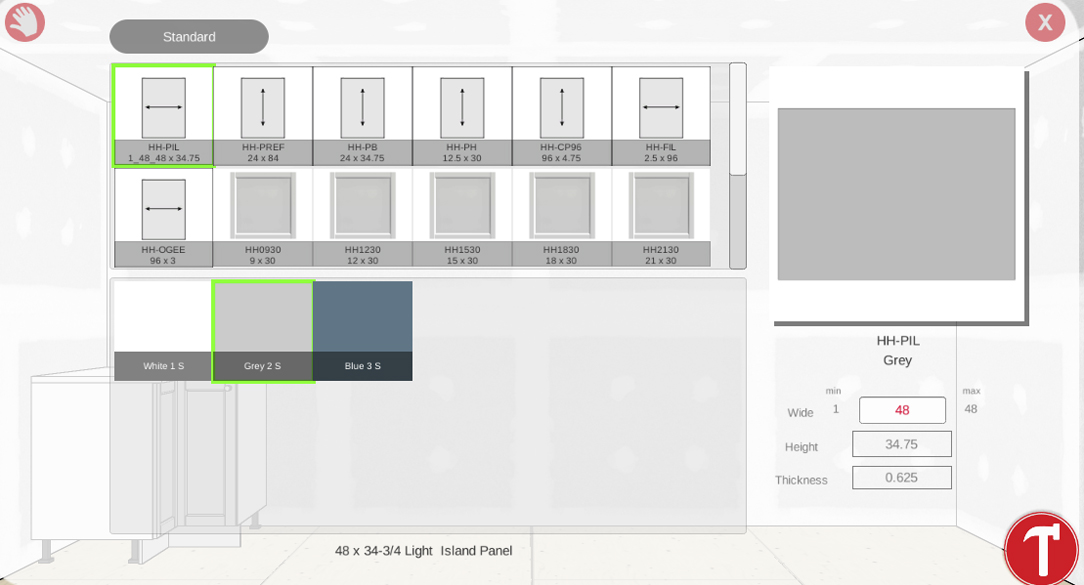
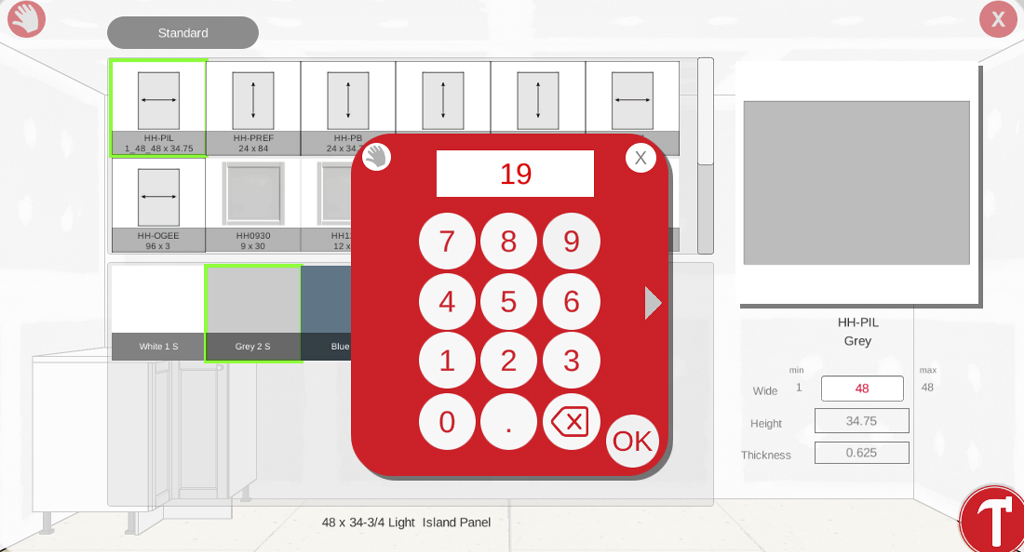
The island panel – click on the cabinet, choose panel – choose size – choose your color – this is the only item in this collection that can be changed to the sized.
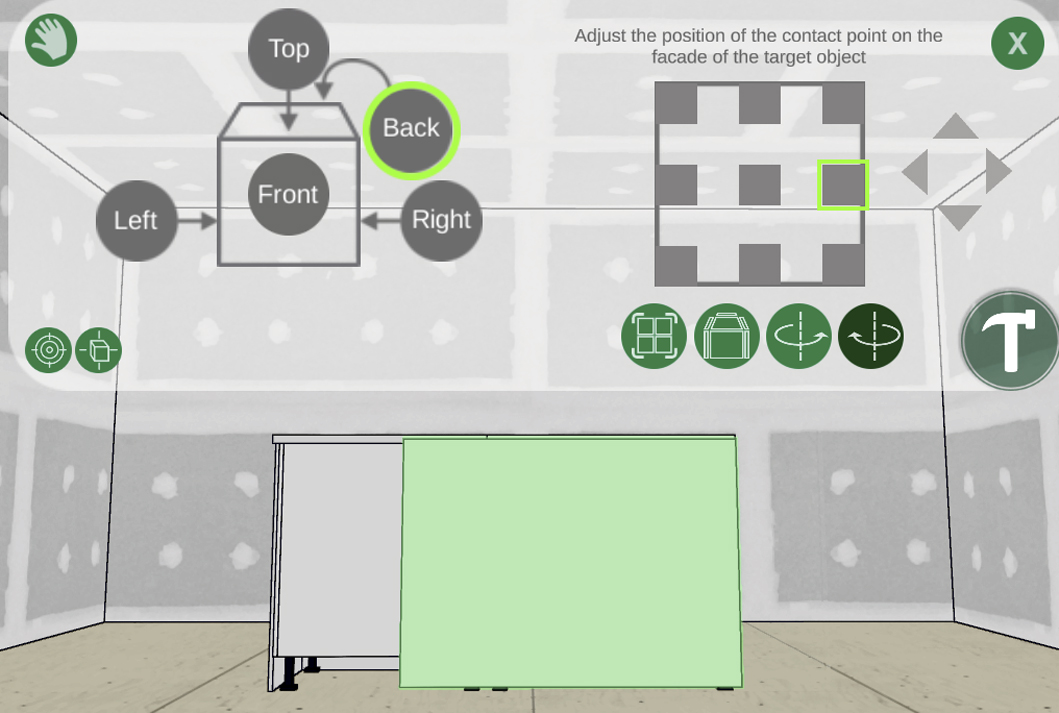
After clicking on the hammer, you must click on the cabinet you want to put the panel, select the place (Back) and then change the direction by pressing the arrows.
For the missing panel, we repeat the same steps, but we change the width of the panel. Important note – the item will not be cut; it is only to offer a visual to the customer.
Island stuck on a wall
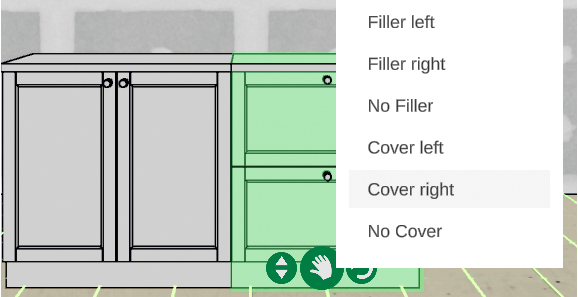
We select the cabinet we want to stick on the wall, we add a filling panel by right clicking cabinet, left fill.
I strongly advise using the magnet to glue the second cabinets side by side.

You add a panel by right clicking on the cabinet, right panel.

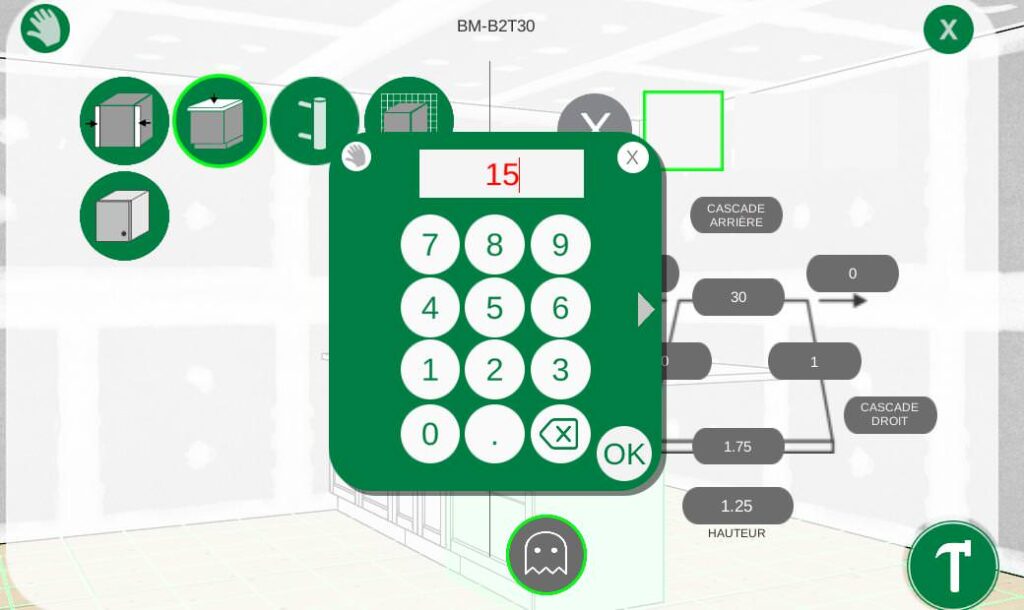
Make the counter wider – click on the cabinet, click on the pencil modify, counter, and write the width you want the counter to exceed if you want to make a lunch counter.
Tips and tricks
TIPS 1
Add a fill panel (FILLER) OR a panel
A
Right click on the cabinet.
B
Add the panel on the side you want.
TIPS 2
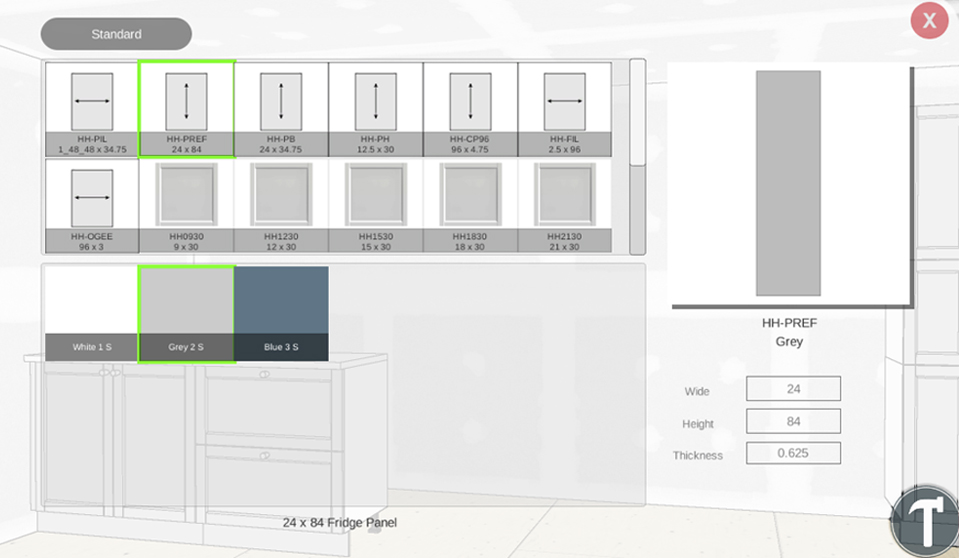
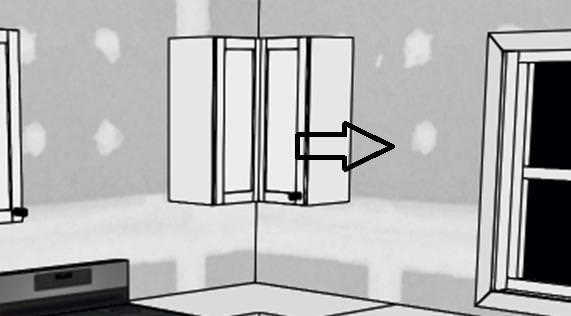
Add a Fridge Panel
TIPS 3
Insert corner cabinet
A
To put a corner cabinet on the left, you have to click on the back wall.
B
To put a corner cabinet on the right, click on the right wall.
Tips 4
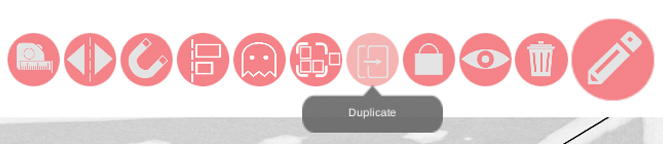
Duplicate an item. If you want a cabinet like this several times.
A
Click on the cabinet.
B
Click on Duplicate.
Tips 5
Glue items together, PANTRY.
A
In order to put a pantry effectively, select a base cabinet without a counter, which is installed in the room.
B
You select the desired pantry, click in the room.
C
Then we select the pantry, we click on the magnetic icon.
D
We click on the bottom cabinet on which we want the pantry on it.
E
You click on it, you select where on the cabinet and then you click on the hammer.

TIPS 6
Change the height/location of the cabinet.
A
When you click on the cabinet, you can change the location by clicking on the arrows.
B
If you click on the hand, you can move the box anywhere in the room.
TIPS 7
Change the color of the cabinets once the cabinet is in the room.
A
Click on the cabinet you want to change the color.
B
Select another color (top left).
TIPS 8
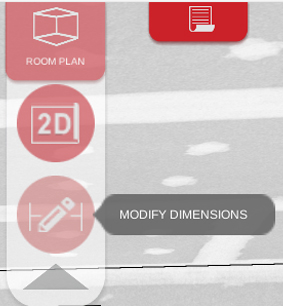
Put the 2D part plan.
A
Click on the cube (top).
B
Click on 2D.
TIPS 9
Change the dimensions of the room.
A
Click on the cube.
B
Click on the pencil – you will find on the page modifying the walls. And we go back to the initial page.
TIPS 10
Remove a counter from an existing cabinet.
A
Click on the cabinet (1).
B
Select the pencil for Editing (2).
C
Click on the counter icon (3).
D
Click on the X (4).
E
Click on the hammer (5).
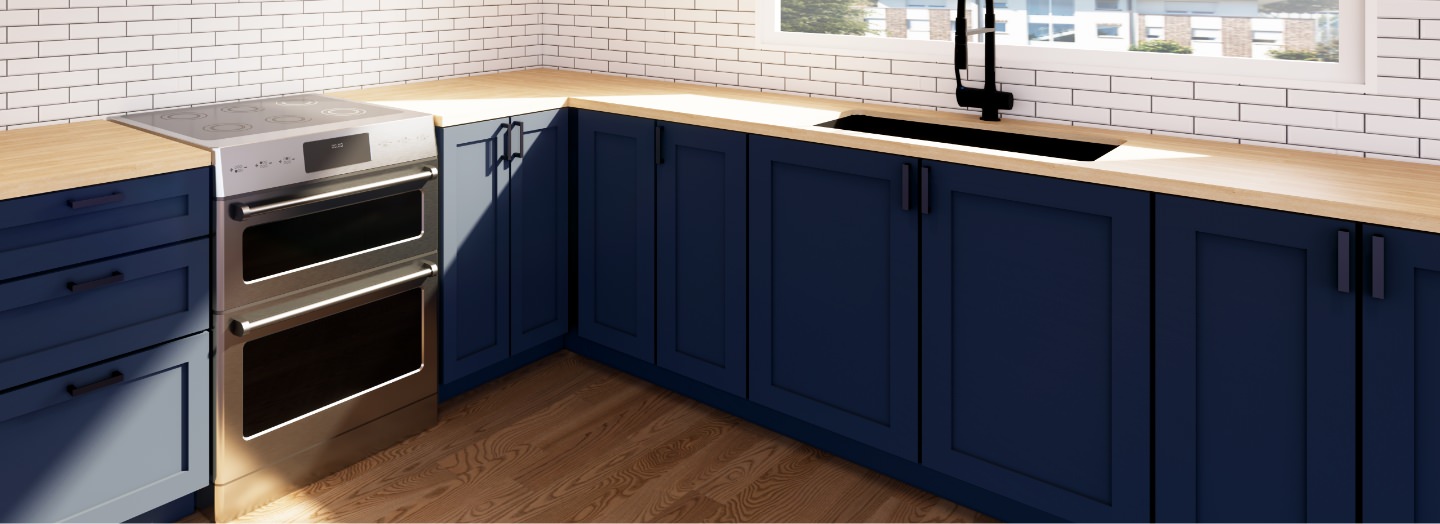
Complete kitchen customization
The kitchen can be 100% designed (wall color, floor, light fixture, accessories, doors, windows and more).
The options are on the right side of the screen.
1. Wall colour
A
Click on the roll.
B
We select if we want all the walls, 1 wall only.
C
Select the colour you want.
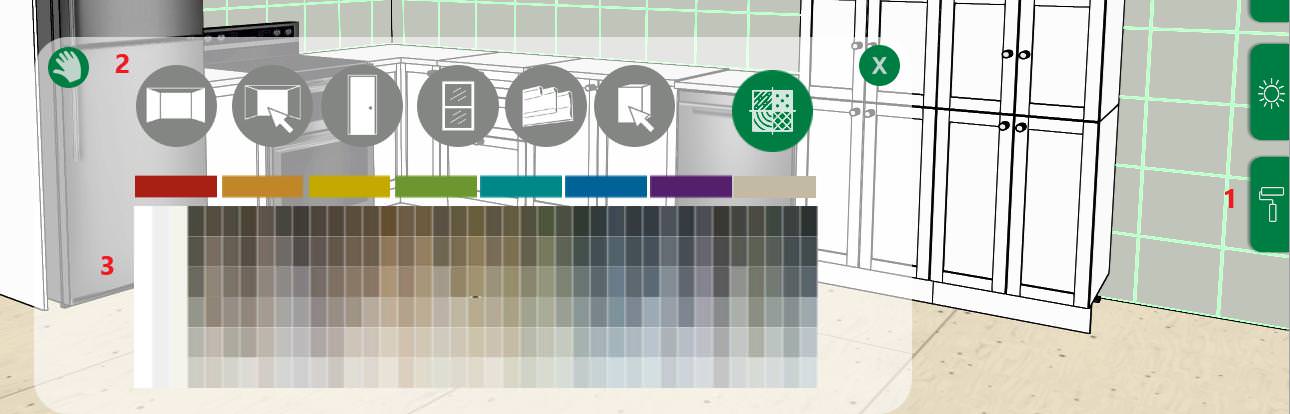
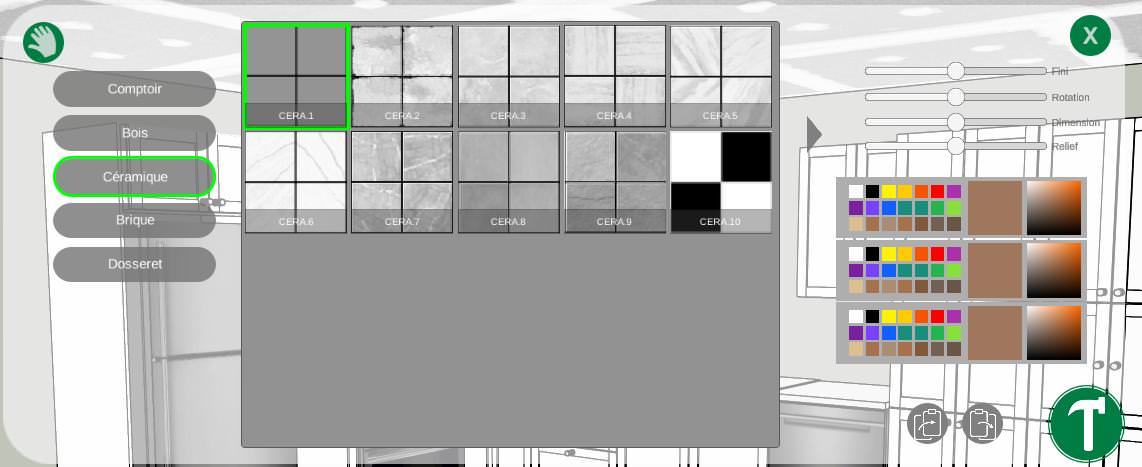
2. Floor Selection
A
Click on the hammer (Design room).
B
Click on the floor.
C
We select the pattern.
D
We change the color (Tile, joint).
E
The dimensions, rotation, and size of the joints can be modified.
F
Click on the hammer to insert.
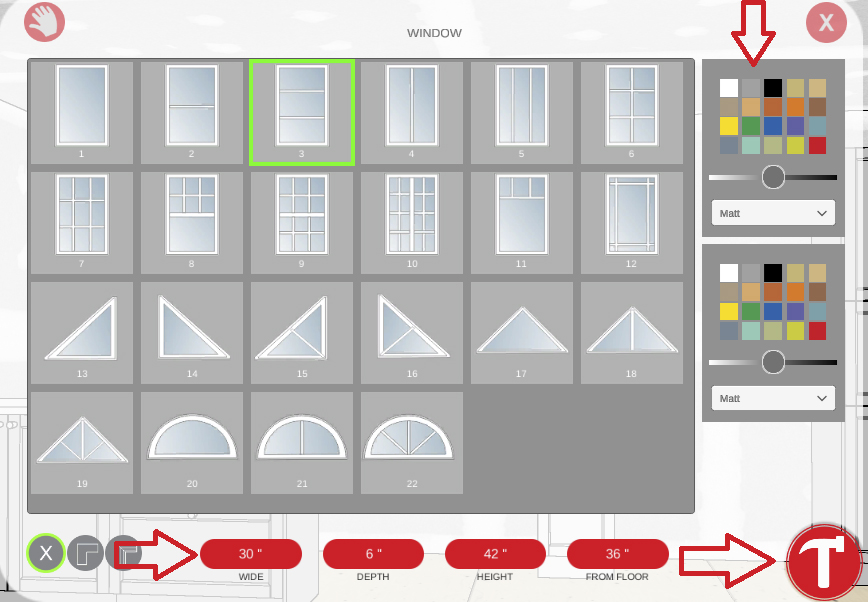
3. Add window
A
Click on the hammer (Design room).
B
Click on the Window symbol.
C
Select the style of window you want in the room.
D
We change the sizes of the window.
E
You can change the color of the window.
F
Click on the hammer to insert the window.
G
We click on the wall where we want the window.
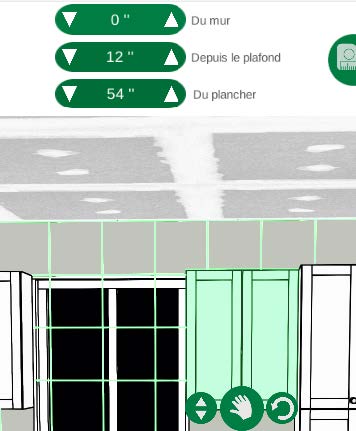
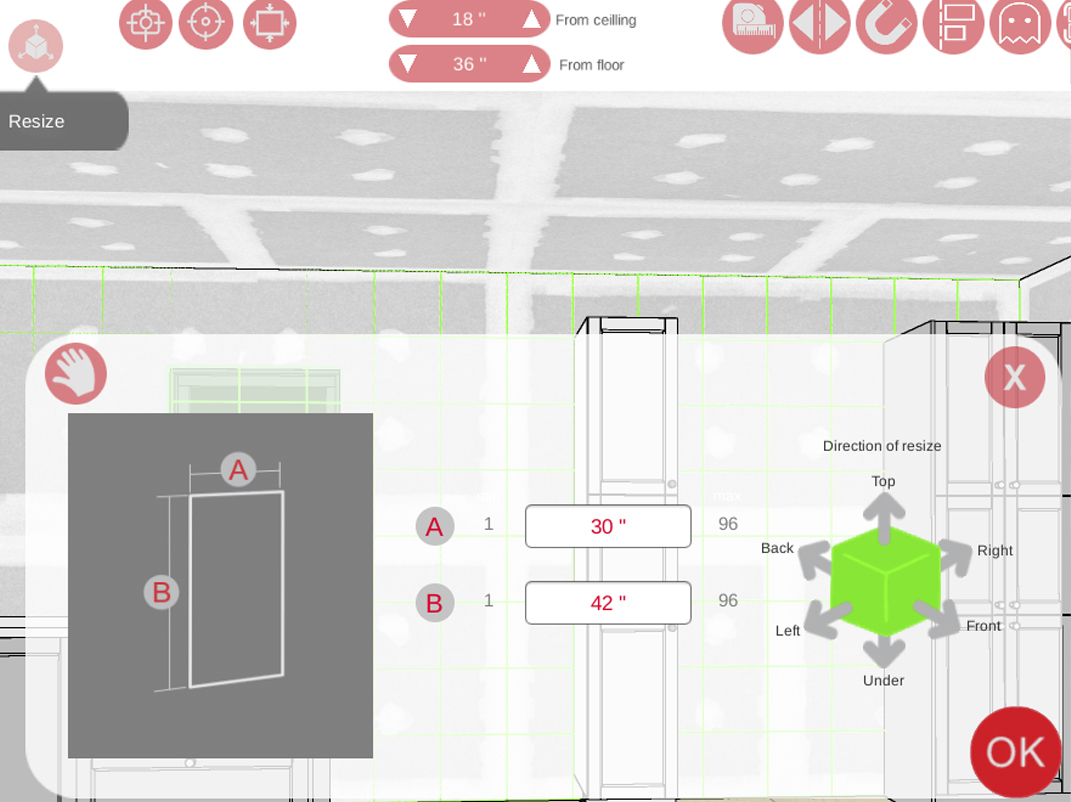
4. Change the dimensions of the window (once it’s in place).
A
Click on the ”resize” button.
B
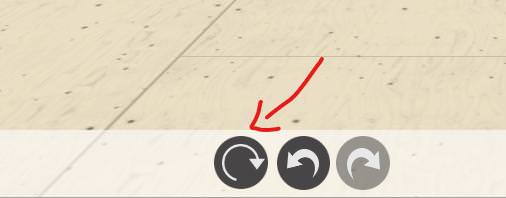
We modify the dimensions.
C
Then we click on the “Refresh” arrow.
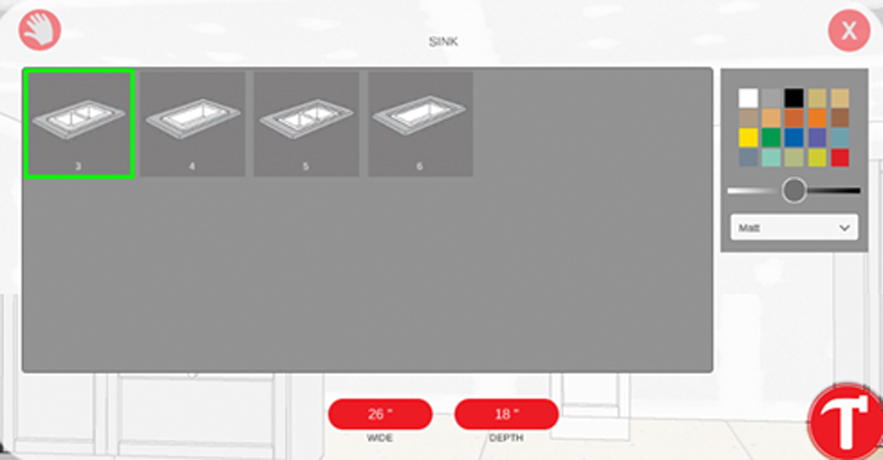
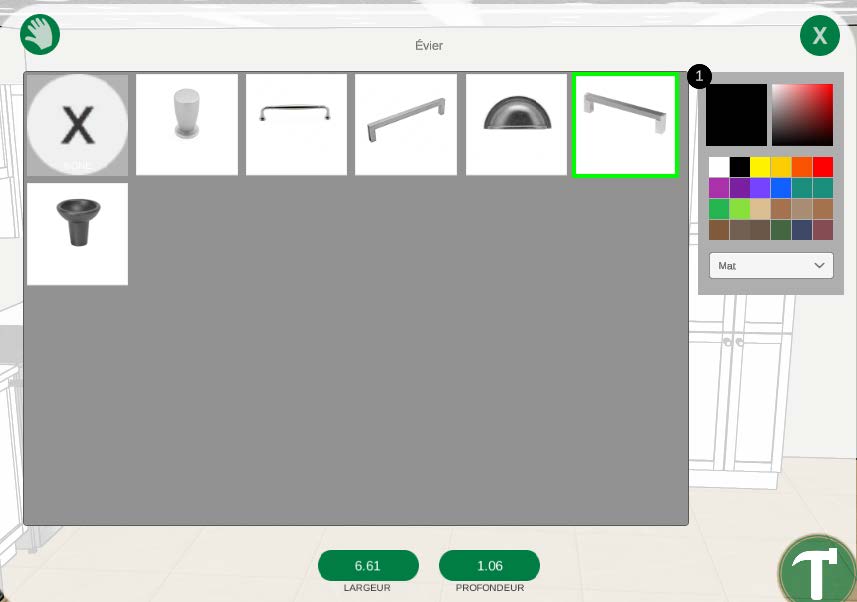
5. Inserted a sink and faucet
A
On the tap (left).
B
We see another image of Faucet and sink.
C
We select Sink.
D
We select the model we want.
E
You can change the dimensions (Width, depth).
F
We change the color.
G
Click on the hammer.
H
We click on the cabinet that we want to have a sink.
I
The sink is added.
*Same steps as the faucet.

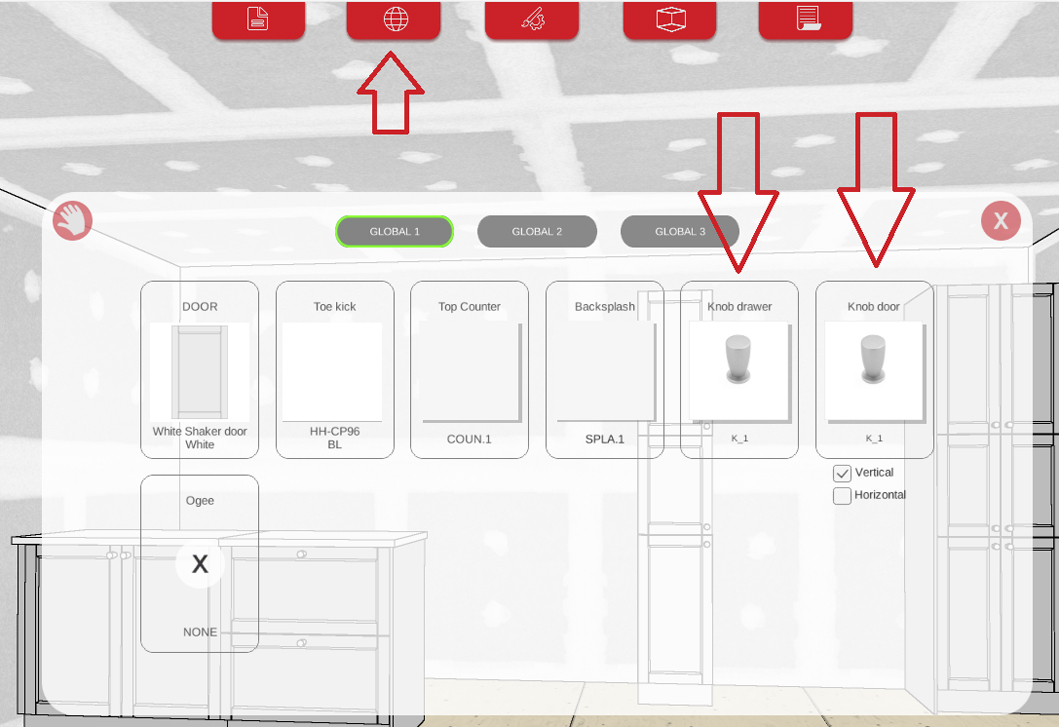
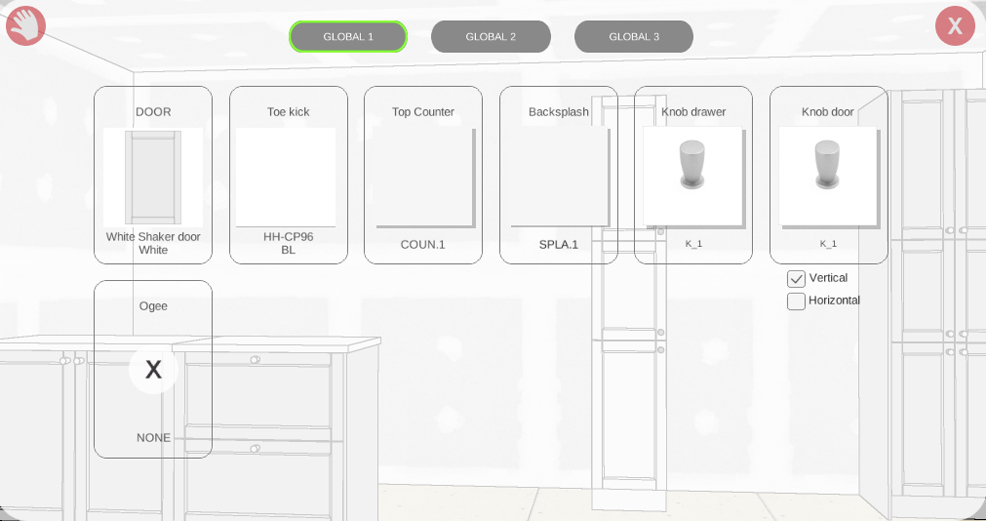
6. Edit the handles
A
Click on the globe.
B
We select the Global according to the color of the cabinet (each color has its own “global”).
C
Click on Drawer or Door Handle.
D
You select the style of handle you want and the color.
E
Click on hammer – the handles will change automatically.
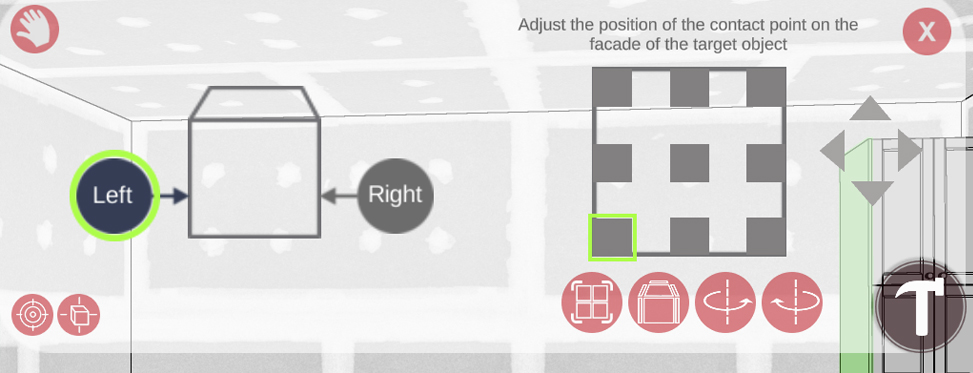
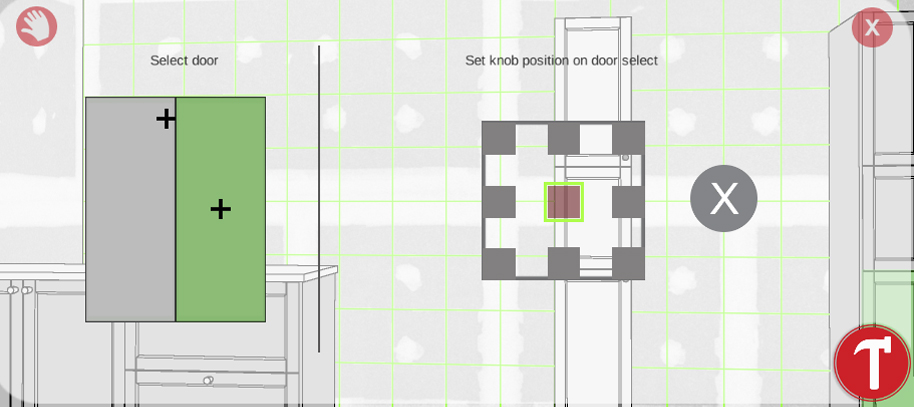
7. Changing the position of a handle on a cabinet
A
Click on the cabinet you want to change the positioning of the handle.
B
Click on the pencil (top).
C
Click on the handle image.
D
Select the door.
E
We click on the square that we want the handle to be.
F
Click on the hammer.
8. Change the colour of countertops
A
Click on the Globe
B
Click on the counter
C
We select the color / pattern
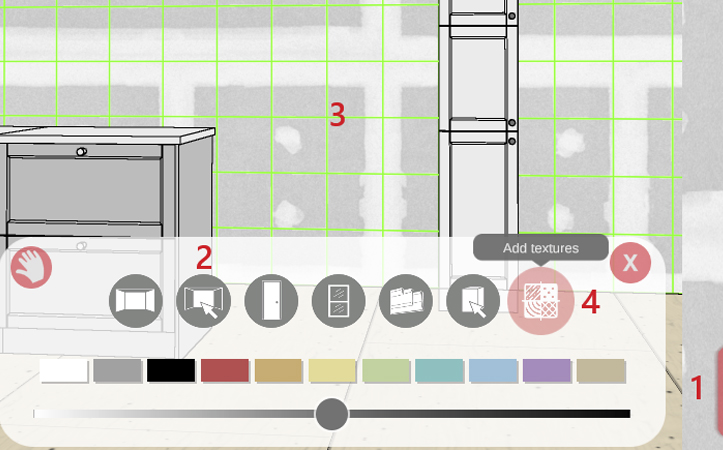
9. Changing the Backsplash
A
Click on the Paint Roller.
B
We click on the Select Wall.
C
Select your wall.
D
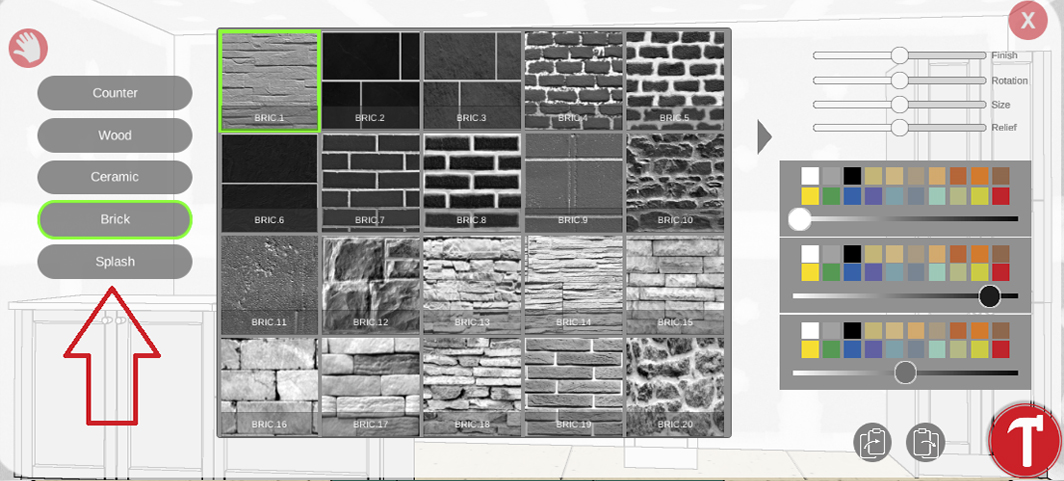
Click on adds texture.
E
You can select the type of pattern you want, you can change the size, rotation, color etc.